I've moved! Follow me over to The Balanced Baker.


Wednesday, October 27, 2010

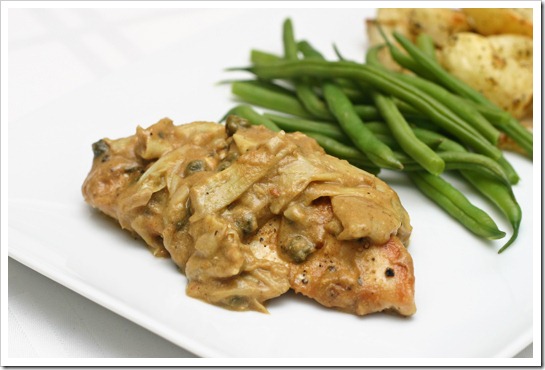
Chicken Breasts with a Mustard Caper Pan Sauce

We have become huge fans of the chicken-with-pan-sauce type of meal. I think it's a great way to add variation to otherwise plain old chicken, while still begin quick to prepare and very flavorful. Another great aspect of this category is that small changes to the sauce, which can often be done with items already in your pantry or fridge, can yield very different dishes.

IMG_0002c

I'd been wanting to make this recipe for quite a while, and when the time finally came, I saw it as an opportunity to use up some artichoke hearts that were in the fridge. They were a great addition to an already wonderful dish!

Chicken Breasts with a Mustard Caper Pan Sauce
Source: Slightly adapted from My Italian Grandmother

  • 2 boneless skinless chicken breasts
  • approx 1/2 cup chicken stock
  • 1 tablespoon unsalted butter (skip the butter and stick with oil for a clean meal)
  • 1 -2 tablespoons of extra virgin olive oil
  • 1 tablespoon whole wheat flour
  • 1 generous tablespoon of dijon mustard
  • 2 cloves of garlic, minced
  • 2 teaspoons of capers
  • 4 artichoke hearts, quartered
  • 1 tablespoon of chopped fresh parsley
  • salt and pepper, to taste

Directions:

Season chicken with salt and pepper. Heat 1 tablespoon of oil and the butter in a saute pan (stainless steel will work best) over medium heat. Saute chicken on both sides then remove to a plate. If the pan is dry add a little more oil and the garlic. Do not let garlic burn or it will taste bitter (lower the heat if necessary). Cook the garlic for a minute and add flour. Allow flour to cook for 1 minute and stir. Turn heat up again if you lowered it an add stock while stirring with wooden spoon or whisk. Add mustard, capers, and artichokes and season with pepper. Taste it before you add salt and adjust salt and mustard accordingly. If you want your sauce to thicken reduce it further, or if you want more sauce add a little more stock and let it reduce. Add parsley. When your sauce is done add the chicken to the pan with and toss to coat. Cover and let it cook for another 5-10 mins (depending on the thickness of your chicken) so chicken is cooked through.

Friday, October 22, 2010

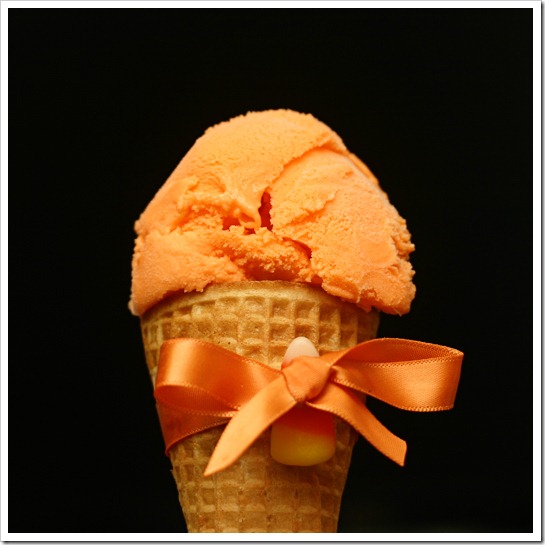
Candy Corn Ice Cream

I love the onset of autumn for a number of reasons. The chill in the air becomes a welcome reprieve from the summer's humidity, the leaves turn vibrant shades of yellow, orange, and red, and stores stock the shelves with Halloween candy. I love candy corn, but rarely purchase it because it is so hard to not eat the whole bag in one sitting, which invariably leads to a stomach-ache (not to mention a giant leap off the Clean Eating wagon).

This year, I couldn't resist picking up a bag when I saw this recipe. How could candy corn ice cream be anything short of fantastic? Not surprisingly, this creamy dessert is super sweet, and is thankfully easier to portion control! The original recipe is even simpler than what I have posted here, but I had some egg yolks to use and decided to make a custard base, rather than a simple Philadelphia style ice cream.

IMG_0036c

Candy Corn Ice Cream
Yield: about 4 cups
Adapted from Culinary Concoctions by Peabody
I found that 11-ish ounces of candy corn was more than enough - next time I might reduce that a little because it is so sweet!

1 cup (8 oz) heavy cream or half and half
2 cups (16 oz) half and half or whole milk
4 egg yolks
11 ounces candy corn (give or take a few Smiley)

Add the cream/half and half/milk to a medium saucepan and bring to a simmer.  Meanwhile, in a separate small bowl, lightly whisk the egg yolks to break them up.  Working two tablespoons at a time, add about 6 tablespoons of the heated cream mixture to the egg yolks, whisking constantly, to temper the eggs.  Add tempered eggs to the saucepan with the heated cream mixture.  Heat over medium heat, stirring constantly, until the mixture is thick enough to coat the back of the spoon (approximately 160 degrees F).

Add candy corn to thickened custard, stirring until the candy corn is mostly dissolved.  Remove from heat and allow to cool slightly.  Transfer to a container and chill mixture at least 4 hours, preferably overnight.  Freeze in your ice-cream maker according to the manufacturer’s instructions.

Tuesday, October 19, 2010

Think Pink! Cranberry Orange Cheesecake Bites

Hooray! It's October, and that means it's time, once again, for The Power of Pink Challenge. I am so glad Jen is hosting this event for another year, as I think it's a great (and fun!) way to remind yourself to stop and think about breast cancer. Do you have a loved one that has been affected by this disease? Maybe you have been affected? Are you doing your monthly self-exams?


I've been slacking a bit on creativity in the kitchen, so this was a very welcome exercise in cooking or baking. I desperately wanted something naturally pink (as opposed to using food coloring, etc), but my first thought when it comes to pink is strawberries. Not only did I use those last year, but October really isn't the height of strawberry season. Two aisles over from the pathetic looking strawberries at the grocery store - the answer was obvious: cranberries!

I absolutely love all things cranberry, and was so excited to come up with something new. Once again, I was stuck on cheesecake this year. I couldn't get it out of my head. I decided to go a different route from last year, and the ideas eventually evolved into these super cute mini cheesecake bites.

IMG_0042c

This cheesecake is not too dense, but rather has a light, almost whipped (heavenly!) texture. They are packed with cranberry and orange flavor, complimented by a rich oreo cookie crust (how can you go wrong with oreos?), and dipped in creamy white chocolate. The combination of flavors is incredible, and I can't wait to make these again!
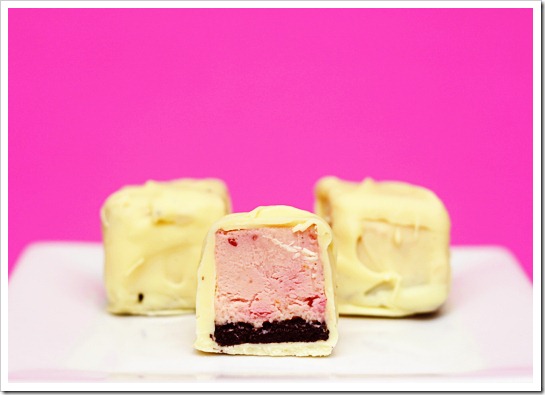
IMG_0051c

Think Pink! Cranberry Orange Cheesecake Bites

Adapted from here and Christine Avanti
Yield: 36 bites

For the cranberry puree:
6 ounces fresh cranberries
1/2 cup sugar
1/4 cup fresh orange juice (from about 1/2 of a large orange)
1/4 teaspoon ground cinnamon
1/8 teaspoon ground nutmeg
2 teaspoons pure vanilla extract

Combine all ingredients except vanilla in heavy large saucepan. Cook over medium heat until mixture thickens and the cranberries start to pop. Allow to cool slightly and transfer to a food processor to (carefully!) puree, or use a hand blender to puree in the pot. Stir in the vanilla extract. Transfer to a bowl, covering with plastic wrap, pressed down on the surface to avoid forming a skin on top of the puree. Refrigerate to cool completely, at least 4 hours. Makes about 1 cup of puree.

For the crust:
1.5 cups crushed oreo cookies (from about 15 oreos)
3 tablespoons melted butter
1 tablespoon sugar

For the cheesecake filling:
2 8-ounce packages of cream cheese (regular or 1/3 less fat), at room temperature
2/3 cup sugar
1 tablespoon pure vanilla extract
2 extra large eggs, plus 1 egg yolk
1 tablespoon orange zest (from about 1/2 of a large orange)
1 tablespoon fresh orange juice
1/2 cup sour cream
2/3 cup cranberry puree

For dipping:
30 ounces good quality white chocolate bar, chopped fine

Preheat oven to 350 degrees F.  Prepare an 8x8 or 9x9 baking pan by lining with a sheet of foil matching the width of the pan, and extending out over two opposites sides of the pan. This will be used to lift the cheesecake out of the pan after it has cooled, for easy slicing. Spray foil and exposed inside edges of pan with baking spray.

To prepare the crust - combine all crust ingredients in a small bowl. Dump out into baking pan and press down into an even layer on the bottom of the pan. Bake crust for 8-10 minutes, then remove from oven and place on a wire rack until cheesecake filling is ready.

Beat 8 ounces of cream cheese and 1/3 cup sugar in a medium bowl with an electric mixer on low until creamy, about 3 minutes, scraping down the bowl a few times. Blend in the remaining cream cheese and sugar, then the vanilla. Blend in the eggs and yolk, one at a time, beating well after adding each one. Beat in the orange zest and juice, then the sour cream just until it's completely blended. Stir in the cranberry puree until the batter is as uniform or marbled as you like.

Pour batter evenly over partially baked crust. Set pan inside a larger one (my 9x13 pan worked great for my 8x8 pan) and add water to the larger pan, about 1 inch deep. Carefully transfer to the oven and bake cheesecake for 35-40 minutes until set and slightly puffy, or until the center no longer jiggles when the pan is gently shaken. Remove the pan from the water bath, transfer to a wire rack, and let cool for 2 hours. Cover the pan and chill in the refrigerator for at least 4 hours. At this point, you can remove the cheesecake, slice into bars as you see fit, and enjoy them that way. Otherwise - you can carry on and enrobe them in white chocolate!

Slice cheesecake into 36 squares. Place on a parchment lined sheet and freeze until firm, at least 2 hours. Over a double boiler, carefully melt white chocolate, taking care not to scorch it. Stir constantly and remove from the heat before all the chocolate is melted - continuing to stir will melt the rest.

Remove a few cheesecake squares at a time from the freezer. Have another parchment lined sheet ready. Working quickly, dip each side of the cheesecake square in white chocolate. I found that with frozen squares, I could hold it with my index finger on top and thumb on the bottom, and rotate all 4 sides through the white chocolate. The coating would harden in just a few seconds, then I could dip the top, and finally the bottom of the squares by holding the sides. The square could then be placed on the parchment lined sheet to finish hardening. If you want to adorn the tops of the squares with something like sanding sugar, have it ready and be prepared to work quickly if you want it to stick! Repeat with remaining squares, rewarming the white chocolate as necessary.

Store cheesecake bites in an airtight container in the refrigerator for a up to a week, or well wrapped in the freezer for up to a month.
Wednesday, October 6, 2010

Apple Cinnamon Caramel Ice Cream

One of the things I love most about our new town is the Farmer's Market. There is one five days a week, each time in a different location in the surrounding area. It makes it so easy to get fresh local produce - if I can't make it on Saturday, I just go on Thursday or Monday.

Palazzi Orchard is a local farm that always has an abundance of apples in many varieties. I was so excited a few weeks ago to see that my favorite - McIntosh - were finally here! I've been snagging a bag of them each week, and I finally decided it was time to get creative and use up some caramel that was cluttering up my refrigerator.
IMG_0004c

I started with a base of cinnamon ice cream that I have made before, and added the apples and caramel, originally envisioning a beautiful swirl.  I didn't get quite the swirl effect that I wanted, but I promise myself someday I will get it figured out. In the meantime, beautifully swirled or not, this is some really fantastic fall inspired ice cream!

Apple Cinnamon Caramel Ice Cream
Yield: About 4-5 cups
*I find that I can still make decent ice cream without needing a ton of heavy cream. When making it for company, I'll always go the full fat route, but for just me and my husband, I usually cut it down a little. If you are unsure of what you will like, start with the cream and half and half, working your way down on subsequent batches to see how much of a change in texture you are willing to take.

8 ounces heavy cream or half and half*
14 ounces 2% milk, whole milk, or half and half*
1 cinnamon stick
1/2 teaspoon ground cinnamon
about 3 cups chopped apple, preferably McIntosh (4 medium large apples or about 1.5 pounds)
2/3 cup honey (can also use sugar)
2 egg yolks, beaten
1/2 cup caramel


Heat cream, milk, cinnamon stick and ground cinnamon in a saucepan over medium heat. Stir occasionally until simmering, but not boiling. Turn off heat, cover, and let steep for 30 minutes.

Meanwhile, peel and thinly slice apples. Add to a saucepan over medium-low heat, and cook down until soft, about 10-15 minutes.

Remove cinnamon stick from cream mixture. Return cream mixture to heat, bring back to a simmer, then add honey and whisk until dissolved. Add 2 tablespoons of heated cream mixture to beaten egg yolks, whisking constantly, to temper the eggs. Repeat 3 more times, then add tempered eggs to the saucepan with the heated cream mixture.

Heat over medium heat, stirring constantly, until the mixture is thick enough to coat the back of the spoon (approximately 160 degrees F). Strain mixture, if desired.

Puree half of the cooked apples and add to cream mixture. Add caramel to the remaining half of cooked apples and stir to combine. Cool both mixtures thoroughly, at least 4 hours in the refrigerator, preferably overnight. Add cream mixture to your ice cream maker and churn for about 25 minutes, or until it is about soft serve consistency. Add caramel apple mixture, then turn off ice cream maker, having let it just lightly swirl the caramel apple mixture into the ice cream. Alternatively, swirl in the caramel apple mixture by hand.